Friday 27 April 2012

Baby presents... And an elephant parade...

Hi again,

So I promised I would show you something again soon and I'm happy to say I got to finish another one of my projects. Let me first tell you how I came about making it. About a month ago I became an aunt for the very first time (yay me!!! And who would have known that my tough, I-never-want-kids brother would melt when looking at his baby girl... ). So, I decided to push some of my ongoing projects aside and start on some little presents for lovely little Lotte (and I really do mean little: she was born about 2 months early and weighed only 1440 grammes (about 3 pounds) ). Sooooooooooooo, having found a great little shop a few weeks before, I decided to paint a bisque piggy bank for her (every child needs to put their savings somewhere...). The problem was that I wanted to paint the piggy bank so it would look like the birth card. I know that doesn't sound like a problem, but keep in mind she was 2 months early so the recent parents were completely unprepared... Luckily, about 4 days later the cards arrived and the next Saturday I got up bright and early and stepped into the shop to paint the piggy bank. 


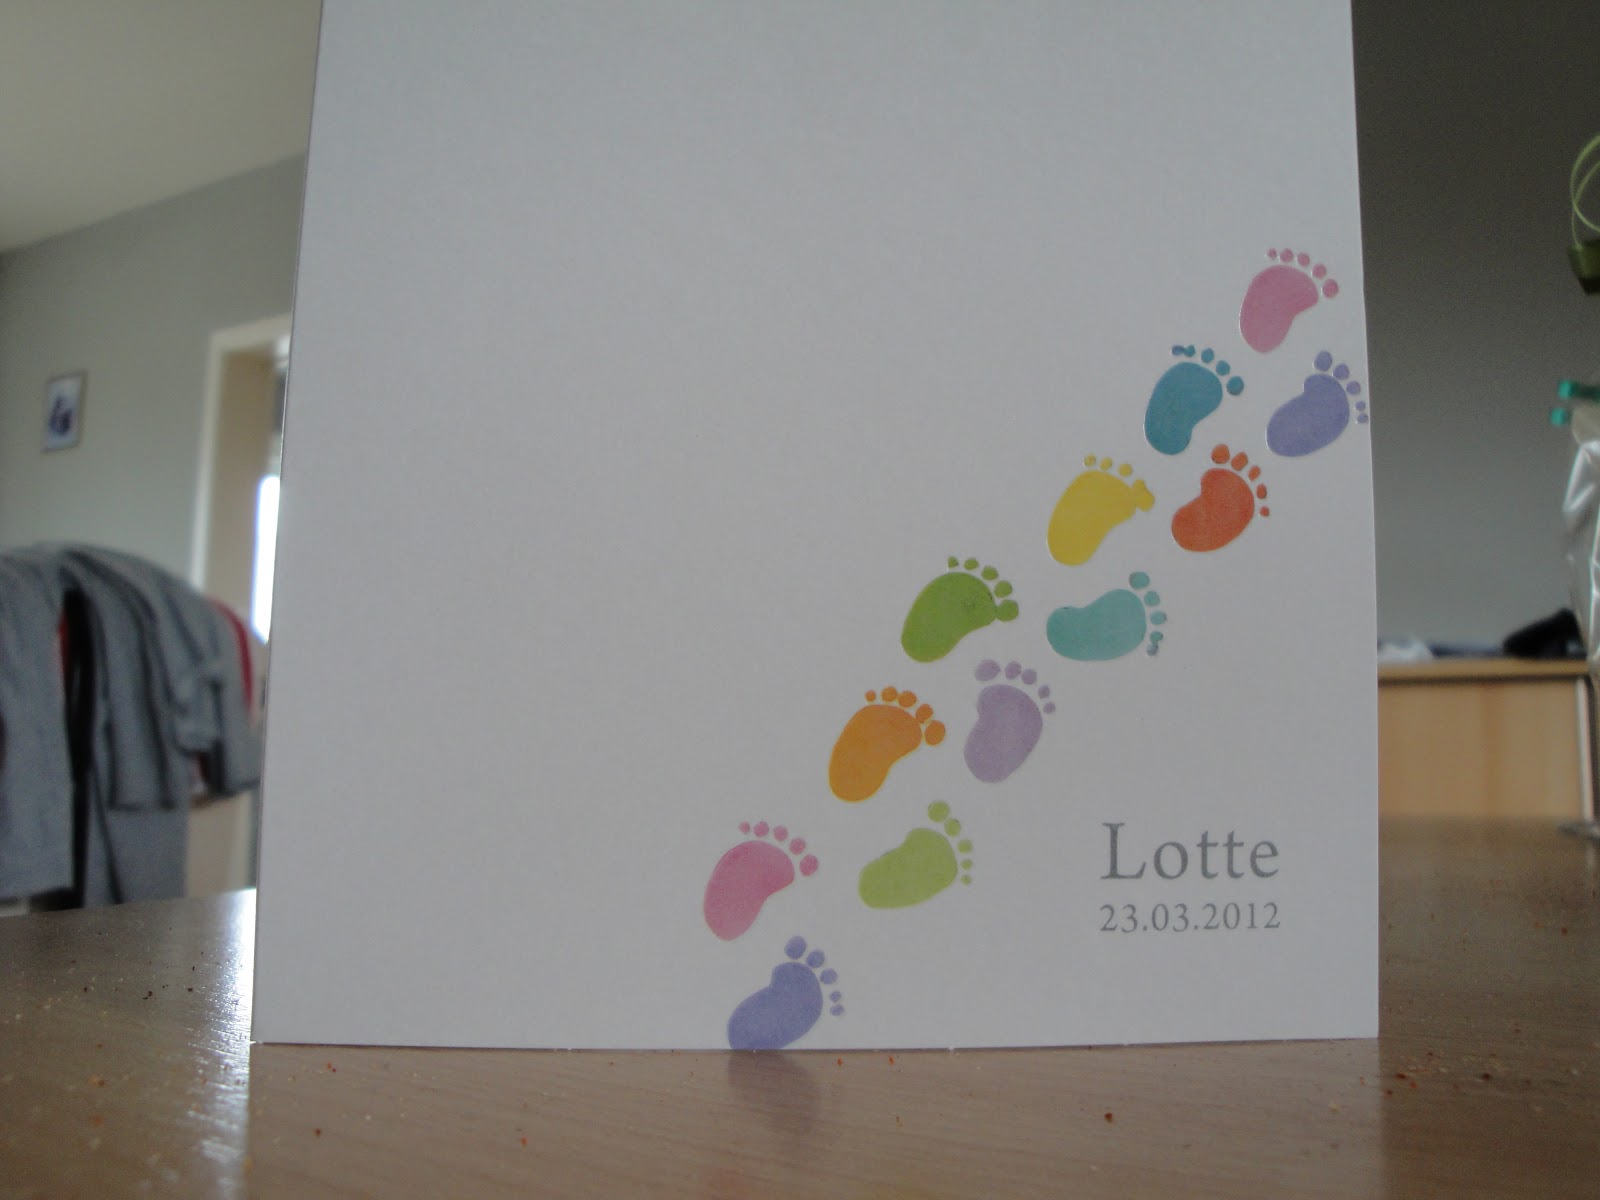
So this is the card. Thankfully the design was not too difficult (if the card was too difficult I would have had the piggy bank painted by the artist who runs the shop, but I really wanted to do it myself, makes it more personal). Anyway, I decided to put the name and the date of birth on the front and the little poem my brother and the misses chose on the back. All around this text I decided to put the different coloured feet. I was pleasantly surprised when the shop owner told me that I could draw on the bisque first (the pencil outlines disappear in the baking process, which really comes in handy when you're a bit unsure about your artistic skills), it made my job a lot easier. So I guess it's time to show you the end result (it was already wrapped at the time, so I apologize if the pictures aren't clear enough).


I actually wanted to paint the letters in hot pink (it is a girl after all), but that paint was not present in the shop so I decided to go for the lime green instead. Anyway, this was homemade present number 1 (I also bought some clothes and a few items from the list, of course). Then, one day I'm spending way too much time pinning (yes, I admit it, I'm a pinterest pinoholic) and I stumbled upon the cutest little sewing pattern...


I thought the elephants were so cute I immediately bought the pattern on etsy... And then a small, really tiny little problem occurs to me: I have never used a sewing machine before. Luckily, my mom had been using a sewing machine since secondary school (and she has one at home), so she taught me how to use it and then sat there when I started cutting the fabric and sewing up my cute little elephant. And this is my process... And the end result...

Let's see if everything works after cutting the fabric

Result after having sewed together the 2 sides


And the end result from the left and the right.

And I must say, as this was my very first project, I think I did a pretty good job. Brother loved it and so did my boyfriend, so much even that he wanted me to make him one too (for the times when I'm not there, so he would still have the elephant and in that way a piece of me. Sweet, isn't it). I had already bought me some cute fabric for stil unknown future projects and I decided to use that for the second elephant. So let me show you how it turned out...


And then... My mom looked at it, told me she loved it and said that the opposite would look great as well. Soooooooooo, I decided to make my own little elephant, the exact reverse of the boyfriend's. And this is the result...


And some duo shots...


And I guess that's the end of my baby presents and elephant parade show-off... I hope you enjoyed it. I know I enjoyed making it. And as always, I hope to see you again soon...

Lots of love,
Crazy Crafter


Monday 23 April 2012

May is closing in... Time for a new assignment

I know, I haven't been posting as much as I should, but I promise you I have been keeping busy. When I find the time, I'll make sure to show you some of the things I've been working on (and have been finishing). But for now I'm just here to announce a new 'project' I'm going to try completing. It's called 'Photo a day May'. The task is that you take a picture on every day in May (duh...). The point is that the picture has to deal with the subject of the day, but since you're allowed to interpret the subject as freely as you wish, it shouldn't be that big of a challenge (I hope, after all I'm not really that great at photography, though I wish I was)... You can see the subjects in the picture below


As you can see, I've obviously got my work cut out for me... Plus I need to post a picture every day as well, meaning that you'll probably be seeing a lot of me in May ;-) For more info, just take a look at http://www.fatmumslim.com.au/2012/04/may-photo-day-list.html and maybe I'll see some of your pictures as well (after all it's not only for bloggers, but also for facebook, twitter and God knows how many other social networks...). So that's it for now. I hope to see you all again soon...

Love, Crazy Crafter xxx

Tuesday 3 April 2012

Some of my first projects...

So, since I haven't finished anything new yet (I actually started on something else today, and I have 2 more projects in mind that I would like to finish within 2 weeks, so yes, I do tend to go a bit crazy sometimes) I've decided to show you 2 of my earlier crafty projects (I asked a friend of mine if I could take some pictures of some of the presents I've made for her before, so I could show them to you wonderful people).

As you all probably know, people tend to feel better around their own kind, and since I have a bit of a quirky (and possibly crazy) side I tend to attract similar people. One of these is a friend I met about 9 (almost 10) years ago when I started college. Now the quirky thing about her is that she loves snails and this obsession, which had been growing since she was a child, actually took on regal proportions when she decided to call herself 'King of Snales' (yes, you've read it correctly, 'King' not 'Queen' or 'Princess', because according to her a king is more powerful). So, what could a girl possibly buy or create for a woman who absolutely looooovvveeesss snails... Yes indeed, we support the snail-craze and provide her with even more subjects...

As you might guess, we loyal 'servants' watch the content of local stores all year long in the hopes of finding the perfect snail for our 'king'. However, since our beloved 'king' has already received quite a vast collection of snails it is becoming more and more difficult to find new ones. So, what is a girl to do? She decides to create a one-of-a-kind, snaily gift. I believe the first one I created is the one below.


For this little projects I bought a polystyrene block in the shape of a snail (this block was my initial inspiration for this project). Afterwards I looked for sequins in beautiful colours, but unfortunately, I could only find these silver and green sequins (we have to make do with what we find). Lastly I bought me a lot of pins so I could put the sequins onto the polystyrene shape. Now I must say it took me quite a few days, painful fingers and one bloody fingernail to get this done, but she did love her present, so I suppose in the end it's all worth it.

Now, the second gift I made for her, was a housewarming gift. I decided to make her a personalised guest towel. As it turned out the towel never made it to the appropriate area (they decided to paint the toilet area a very hot pink, making the towel completely inappropriate for such a lively room) and is instead currently on display with the many other snail items she has collected and received over the years. So, here are some pictures (I'm afraid I didn't get to photograph the whole, since it's really covered with other items and difficult to extract from the case).


As you can see, I decided to buy a simple silver-grey guest towel and then add some cross stitch applications in order to personalise it (in this case I created a crown in the middle and surrounded it by 4 snails (2 on each side). I did this on a small canvas band that was afterwards sewn onto the towel). Since purple is her favorite colour, I naturally decided to use different hues of purple in order to create the snails. In the end I thought it turned out beautifully, and our beloved 'king' loved the towel as well.

So you see that you don't need to look too far in order to create something lovely and personalised. Just think of the person you're creating for and what (s)he loves, I'm sure you'll come up with something that will bring a sparkle to his or her eyes... Now, as always, thanks for reading, and I hope to see you again soon...

Lots of love,
Crazy Crafter xxx

Monday 2 April 2012

Cupcake recipes...

So, I've decided to just add the cupcake recipes for those who can't wait to try them themselves ;-) You'll notice pretty soon that the vanilla cupcake recipe is the basis for all of the other cupcakes. So let's just start with that one...

Vanilla cupcakes (for +/- 12 cupcakes):

Ingredients:
  • 125g self-raising flower
  • 125g sugar
  • 125g butter
  • 2 eggs
  • 1/2 teaspoon vanilla extract
  • 2 table spoons milk
Recipe:
  1. Take the butter out of the fridge so it can come to room temperature.
  2. Pre-heat the oven to 170°C
  3. Put everything, except for the milk, in a bowl and mix it.
  4. Add the milk and mix it again
  5. Put the paper cupcake shapes in your cupcake baking tin.
  6. Fill your paper cupcake shapes up to 2/3rds
  7. Put the cupcakes in the oven and allow them to bake for about 15-20 minutes (make sure to check whether they're completely solid before taking them out. Just use a knitting needle or a knife or fork. If the dough doesn't stick to the needle anymore, the cupcakes are ready)
  8. If the cupcakes are ready, take them out of the oven and allow them to cool on a grid (in this way the cupcakes can cool evenly)
  9. When the cupcakes have cooled, you can start your decorating :-)
Chocolate cupcakes:

Ingredients:
  • See vanilla cupcakes
  • 100g dark chocolate
  • 100ml cream
Recipe:
  1. Complete step 1-3 from the vanilla cupcakes
  2. Melt the chocolate with the cream
  3. Add the chocolate to the batter and mix it again
  4. Add the milk to the batter and mix it one more time.
  5. Complete step 5-9 from the vanilla cupcakes.
Mojito cupcakes:

Ingredients:
  • See vanilla cupcakes
  • 1 lime
  • some fresh mint
  • a splash of rum
Recipe:
  1. Complete step 1-3 from the vanilla cupcakes, but also add the rum and some lime zest before mixing the ingredients.
  2. Complete step 4-9.
Decorating the vanilla, chocolate and mojito cupcakes:
I used a butter cream to decorate these cupcakes.
  • For the basic recipe you need to mix 250g powdered sugar and 250g butter.
  • Chocolate recipe: also add cocoa powder until it tastes the way you want.
  • Mojito recipe: also add some rup, juice from 1/2 lime and some finely cut mint.

Tiramisu cupcakes:

Ingredients:
  • See vanilla cupcakes
  • A splash of amaretto
Recipe:
  1. Complete step 1-3 from the vanilla cupcakes + add a splash of amaretto to the batter before mixing it for the first time.
  2. Complete step 4-9 from the vanilla cupcakes.
  3. The decoration of this cupcake consists of a mascarpone cream topping. For this you'll need: 300g mascarpone cream, 100g powdered sugar, 75 ml cream and a splash of amaretto. Just mix the ingredients until you get an airy mixture. Then put it on the cupcake and finish it of with some cocoa powder and a chocolate coffee bean.

Let's make another appearance, shall we...

Hi everyone,

Sorry I've been away for so long, but work and complicated family stuff does keep one busy... Anyway, I've been working on quite a few things. For one think I've been doing some baking for a few lucky celebrating friends (while March never was a birthday-filled month, it seems to have become one over the years)... Results: one extremely powerful chocolate mousse cake, a batch of delicious and very chocolaty brownies, a plain old vanilla cake, biscotti and some cupcakes (vanilla, chocolate, tiramisu and mojito; personally I really love the last ones... Cupcakes filled with limy, minty deliciousness... and rum ;-) ). I'm afraid I only managed to take some pictures from the cupcakes and the biscotti. Everything else disappeared before I actually thought of photographing it...

The biscotti

And some cupcakes. From left to right you can see the chocolate, tiramisu and vanilla cupcakes...

And here are the mojito cupcakes...


So, here you have it, some of my baking goods... I'm also thinking about posting the recipes... So I'll keep you updated on that ;-) For now I hope you've enjoyed what I've created and as always I hope to see you again soon...

Love,
Crazy Crafter xxx